How to connect multiple PC fans? The keys to do it correctly
When it comes to connecting one it can be simple, but several PC fans can sow doubts to certain users. Therefore, we teach you the keys to achieve it.
The ventilation of a tower is essential for the heat transfer from the inside to the outside to be effective. If we don't, the hot air will stay inside, which can trigger the fateful thermal throttling in the GPU, CPU or M.2 SSD. Therefore, we are going to see how we can connect several PC fans, as well as what tricks there are.
Table of contents
How to connect several PC fans
Connecting a fan is not complicated because the motherboard has enough connectors. The problem occurs when we want to install several and there are only 4 or less connectors for it, so we are going to observe some tips for the installation of PC fans.
Direction of each fan
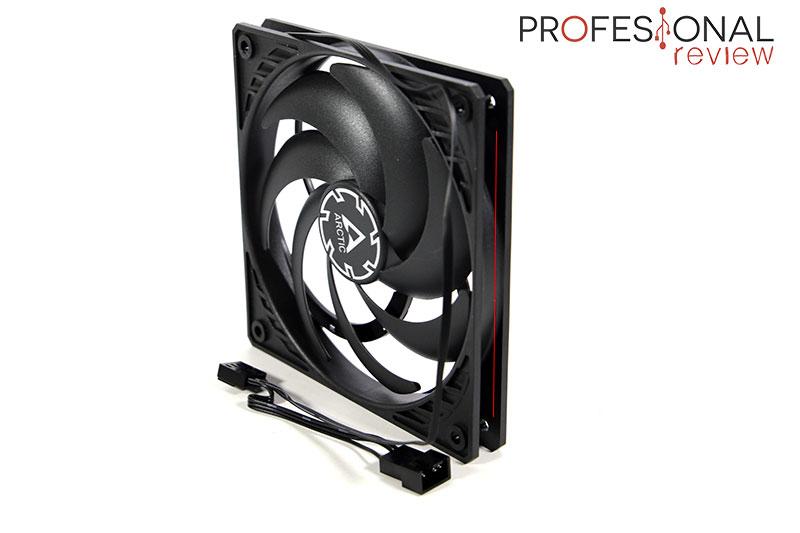
You must know that the fans only push air in one direction, so we must position them correctly to create a decent air circulation inside the case. As a trick, look at the back of the fan because there are usually arrows that indicate where they push the air.
No arrows on the back? Nothing happens, in the instruction manual of the fan the manufacturer has to specify it, as well as they will put illustrations of how to arrange it in the box. This is very important, especially when we are going to install several fans in the PC case.
Where to connect each fan
On most motherboards we will find 4-pin connectors with the following descriptions:
The ideal is to connect the PC fans in the connectors that are SYS_FAN and CHA_FAN, especially in order to reprogram them later. If you buy a fan extension card and have an EXT_FAN, plug it in there.
HUB adapter to connect more fans

It is not uncommon to see how many users have a large box in which they can install many fans. The tradeoff to this is that you may find that your motherboard has insufficient 4-pin CHA_FAN or SYS_FAN connectors.
Don't worry, there is a solution and it is a HUB adapter that with only one 4-pin connector outputs several 4-pin ports; come on, an adapter of a lifetime. All the news is good with these HUBs because:
Rebates GeekerChip PWM Fan Hub,Fan Hub Splitter Cable-1 Female for Computer 12V 4-Pin Fan Hub 4 pin compatible with 12V CPU and case fans with 4-pin connector. €4.99
Last update on 2022-01-19
SATA adapter for fans
Yes, as you read: use a SATA port to connect several fans. We rarely use more than 2 SATA 6Gb/s ports because we don't usually install many SSDs; even less with the arrival of M.2 SSDs, which have an assigned slot.
In the end, the purpose is the same: power several fans from one connector. In this way, we can feed up to 4 additional fans through just one connector. Of course, this can cause problems when reprogramming them later because the SATA connection is atypical for these purposes.
12 V 4 Pin PWM and 5 V 3 Pin ARGB with SATA 15 Pin Power 2 in 1 Hub 6 Way Sync CPU RGB Fan Lighting Splitter14.00 EUR
Last update on 2022-01-19
HUB to control all the fans
The user is usually focused on connecting and running all the fans on the PC, but how are you going to control them? Well, Noctua or Corsair have their own HUB, which acts as a switchboard where all the fans are connected and, thus, you can control them all without problems.
We highly recommend buying these HUBs if you have different fans of the same brand, such as Corsair. The American brand encourages its ecosystem with its own HUB, being able to synchronize the lighting of all Corsair fans through the HUB.
So, it is not only useful for programming the ventilation curves, but also for having synchronized lighting in the box.
Noctua NA-SYC1, 4-Pin Y-Cable for PC Fans (Black) The 4-pin connector is compatible with 3-pin and 4-pin fans; Black connectors and black cable braiding for a cleaner look8.90 EUR
Last update on 2022-01-19
Corsair CO-8950020 Six (6) RGB LED Hub, Ports for CORSAIR RGB HD and SP Series Fans, RGB Hub Fan The hub and RGB LEDs are powered via an integrated SATA connector21.23 EUR
Last update on 2022-01-19
Buy 140mm fans
In case the PC case allows us to connect 140mm fans, we recommend this option because it will considerably increase the cooling capacity (as long as the flow parameters are followed air flow, RPM and static pressure).
This way, we won't need as many 120mm fans, which gives us the problem of not having enough headers on the motherboard. For example:
Extra tip: don't over-tighten the screws
We thought it useful to close this article with a piece of advice that will come in handy for the future maintenance of your fans. It's always good to be proactive, and it seems that when we install them, we tighten the screws almost as far as they can "so they don't vibrate" or "don't come loose".
Well, we are going to advise against tightening the screws too much because, over time, you will have to clean them. To do this, you will work more comfortably unscrewing them and cleaning them on a table.
As time passes, there are boxes that have materials that can contract due to heat or the conditions to which they are exposed. This can make it very difficult to unscrew the fan if we tighten it hard in its day.
We hope this information has been useful to you. If you have any questions, you can comment below and we will answer you immediately.
We recommend the best air cooling products on the market
Does your motherboard have enough connectors? Has this ever happened to you?


